RMagickの使い方 (How to use RMagick)
サーバーに上げてみたKaoChartは想像を遥かに超える重さで、このままでは世間様に全く申し訳が立たないので今さら真面目にRMagickのドキュメントを読んでみる。
ちなみにちょろっと読んだ結果、数倍は早くなりそうな予感。画像生成部分は修正と言うより作り直しっぽいけど。まぁとにかく作ってみたくて、中身はものっそ適当だったしなぁ。
てことで以下、訳。
......
http://www.simplesystems.org/RMagick/doc/usage.html
基本コンセプト
RMagickにおける"Hello, world"みたいなものを見てみよう。このプログラムは"Cheetah.jpg"と言う名前のファイルを読み込んで、モニタに表示する。
1. require 'RMagick'
2. include Magick
3.
4. cat = ImageList.new("Cheetah.jpg")
5. cat.display
6. exit
MS Windowsユーザ向け補足: このdisplayメソッドはMS Windowsでは動作しない。生成したイメージを見るには別にビューアーを使用すること。
一行目で、Magickモジュールを定義するRMagick.rbファイルをrequireしている。Magickモジュールには次の3つの大事なクラスが含まれる: ImageList, Image, Draw。この「基本コンセプト」のセクションではImageListとImageクラスについて説明する。Drawクラスについては下の「イメージを描画してテキストを追加する」セクションで説明している。
5行目ではimagelistを生成して、カレントディレクトリのCheetah.jpgファイルを読み込んで初期化し、6行目でそれのdisplayメソッドを呼び出す。imagelistにdisplayメソッドを送るとimagelistに含まれる全ての画像がデフォルトのX Windowスクリーンに表示される。今回は、displayメソッドによってチーターの画像がモニタに表示される。
早速このプログラムを打ち込んで実行してみよう。Cheetah.jpgファイルはRMagickのドキュメントをインストールしたディレクトリの下のex/imagesにある。
ImageとImageListクラスは密接に関連している。Imageオブジェクトは一枚の画像か、もしくは複数のフレームを持つ画像の一フレームをあらわす。(複数フレームを持つ画像の例としては、アニメーションGIFや、複数レイヤをもつPhotoshopイメージがある。)ImageオブジェクトはGIFやPNG、JPEGなどの画像から生成できる。大きさを指定してスクラッチから画像を生成してもいい。画像はディスクに書き込んだり、スクリーンに表示したり、サイズや傾きを変更したり、フォーマットを変更したり、100を超えるメソッドを使ってその他いろいろ修正できる。
ImageListオブジェクトは画像のリストで、ゼロ個以上の画像とシーン番号を持つ。シーン番号は現在のイメージがどれかを示す。ImageListクラスはリストに含まれる全画像を操作するメソッドを持ち、例外もあるがImageクラスで定義される全てのメソッドも実行できる。Imageのメソッドは画像一つだけに有効なので、ImageのメソッドがImagelistに対して呼び出されたときは、シーン番号で示される現在の画像に渡される。
ImageListクラスはArrayクラスのサブクラスなので、ほとんどのArrayメソッドを利用してimagelistに含まれる画像を操作できる。例えば、<<メソッドを使ってリストに画像を追加できる。
もう一度例に戻って一つ変更してみる。
1. require 'RMagick'
2. include Magick
3.
4. cat = ImageList.new("Cheetah.jpg")
5. smallcat = cat.minify
6. smallcat.display
7. exit
違いは5行目にある。この文はimagelistにminifyメソッドを送信する。minifyメソッドはImageのメソッドで画像のサイズをオリジナルの半分に縮小する。minifyはImageのメソッドなので、ImageListクラスはカレントイメージ(だけ)にminifyを送信することに注意しよう。戻り値はサイズが半分になった新しい画像になる。
6行目はImageクラスのdisplayメソッドの例で、X Window画面に画像を一枚表示する。Image#displayはモニタに(今回は小さな)チーターの画像を表示するだろう。
次に、この小さなチーターをGIFフォーマットのファイルに変換してみる。
1. require 'RMagick'
2. include Magick
3.
4. cat = ImageList.new("Cheetah.jpg")
5. smallcat = cat.minify
6. smallcat.display
7. smallcat.write("Small-Cheetah.gif")
8. exit
7行目の文は画像をファイルに書き込む。ファイルの拡張子がgifであることに注意。画像を書き込むとき、Magickはファイルの拡張子を使って書き込むファイルフォーマットを決定する。この例で、Small-Cheetah.gifファイルはGIF形式で保存される。画像をあるフォーマットから別のフォーマットに変換するのがどんなに簡単か分かるだろ?(さらに詳細は、画像フォーマットとファイル名を参照)
ここでなぜ私は先の例の中でcat変数に、一つしか画像を含まないImageListオブジェクトではなくて、Imageオブジェクトを使わなかったんだろう。正直に言えば、別に理由はない。処理するものがたった一枚の画像なら、ImageListとImageは多くの場合交換可能だ。
注: 多くの場合、Imageのメソッドは受け取る画像を変更しない。その代わり適切に変更された新しい画像を返す。例えば、resizeメソッドは指定されたサイズの新しい画像を返す。レシーバーになる画像はなにも変更されない。(Rubyの規約に従って、レシーバーオブジェクトを変更するメソッドは、メソッド名の最後に"!"が付く。例えば、resize!メソッドはレシーバーを変更する)
画像の読み込み・書き込み・生成
君は既にImageList.newを使ってImageListを生成し、指定した名前を持つ画像ファイルで初期化できることを学んだ。実は、newは引数としてファイル名をいくつでも受け取ることができる。もしファイルが一つの画像しか含まないのなら、newはそのファイルを読み込んで、Imageを生成し、ImageListにそれを加える。もしファイルが複数のフレームを持つ画像ファイルなら、newはファイル内のそれぞれのフレームまたはレイヤーにそれらを追加する。そのあと、最後にnewはシーン番号をImageList内の最後のイメージを指すように変更する。単純な例で、一枚の画像をファイルから読んだ場合はシーン番号は0に設定される。
Image.newを使ってスクラッチから画像を生成することもできる。このメソッドは2つまたは3つの引数をとる。一番目の引数は生成される画像のカラム数(幅)で、二番目の引数は行数(高さ)になる。もし3番目が存在したら、それはFillオブジェクトだ。"空の"画像をImageListに追加したいときは、ImageList#new_imageを呼び出す。このメソッドはImage.newを使って、新しい画像をImageListに追加し、シーン番号をその新しい画像に設定する。空の画像はdrawingしたり、composingして画像を生成するのに向く。
ImageやImageListのその他多くのメソッドと同じく、Image.newもオプションのブロック引数を取り、追加のオプションをパラメータとして渡すことができる。ブロックが存在すると、Image.newはパラメータオブジェクトを生成して、そのオブジェクトのスコープでブロックに渡す。パラメータオブジェクトのクラスで定義されている属性のセッターメソッドを使ってパラメータを設定できる。例えば、新しい画像の背景色を赤く設定したい場合は次のようにbackground_color=メソッドを使用する。
require 'RMagick'
include Magick
# Create a 100x100 red image.
f = Image.new(100,100) { self.background_color = "red" }
f.display
exit
パラメータブロック内ではselfを使用して、Rubyにそれが変数への代入ではなくメソッド呼び出しであることを教えること。
Image.captureを使ってXWindowスクリーンから画像を生成することもできる。このメソッドはルートウィンドウ、または名前もしくはIDで指定されるウィンドウ、もしくはマウスのドラッグ&ドロップでインタラクティブに望みのウィンドウの□領域をキャプチャできる。
ImageクラスもImageListクラスもwriteメソッドを持ち、どちらも引数として書き込むファイルの名前を受け取る。Image#writeは単純に画像をファイルに書き込む。Image#readメソッドと同様にwriteもオプショナルなブロックを受け取り、画像をどのように書き込むかパラメータで制御できる。
ImageListオブジェクトが画像を一つしか含まないときはImageList#writeはImage#writeと同じだが、複数のイメージと、マルチフレームをサポートする画像フォーマット(先に述べたようにファイル拡張子で指定される)を持つときは、Image#writeは自動的にマルチフレームイメージファイルを生成する。
例えば、以下のプログラムは3つのGIFファイルを読み込み、ImageList#writeを使ってそのファイルに含まれる画像を全て(入力されるそれぞれのファイルは複数の画像を持つことがあるのを忘れないこと)一枚のアニメーションGIFファイルに保存する。
#! /usr/local/bin/ruby -w
require 'RMagick'
anim = ImageList.new("start.gif", "middle.gif", "finish.gif")
anim.write("animated.gif")
exit
画像を表示する
RMagickではImageとImageListを表示するメソッドが3つ定義されている。ImageクラスもImageListクラスもdisplayメソッドを持つ。Image#displayメソッドはデフォルトのXWindowスクリーンに画像を表示する。画像を一つしか含まないImageListの場合、ImageList#displayはImage#displayと全く同じだけど、複数の画像を持つときは、ImageList#disoplayはそれぞれの画像を順番に表示する。どちらの場合も、表示されているウィンドウを右クリックすればオプションメニューが表示される。
ImageList#animateメソッドはimagelist内の画像を順番に繰返し表示する。アニメーションのスピードはImageList#delay=メソッドで制御できる。
画像を調べたり変更したり
imageやimagelistを生成したあと、それをどうすればいい?ImageとImageListには100を超えるメソッドが定義されていて、個別にまたはグループに対して調べたり変更したりできる。ImageListクラスに同じ名前のメソッドが定義されていなくても、Imageクラスに定義されているメソッドは全てImageListインスタンスに送れることを覚えておこう。ImageListクラスはそのメソッドをカレント画像に送り、その結果を返してくれる。
これらのメソッドは大まかに以下のグループに分類できる。ImageListメソッドの説明はこのように示される。一覧に現れるメソッドのいくつかはxMagickのあるバージョンで利用できないこともある。詳細についてはメソッドのドキュメントを参照。
ユーティリティメソッド
- <=>
- Compare 2 images
- <=>
- Compare 2 imagelists
- [ ]
- Reference an image property
- [ ]=
- Set an image property
- add_profile
- Add an ICC, IPTC, or generic profile
- changed?
- Has the image been changed?
- channel
- Extract a color channel from the image
- compare_channel
- Compare one or more channels between two images
- channel_depth
- Return the depth of the specified channel or channels
- channel_extrema
- Return the maximum and minimum intensity values for one or more channels in the image
- clone
- Return a shallow copy of the image
- clone
- Return a shallow copy of the imagelist
- color_histogram
- Count the number of times each unique color appears in the image
- copy
- Return a deep copy of the image
- copy
- Return a deep copy of the imagelist
- delete_profile
- Delete an ICC, IPTC, or generic profile
- difference
- Compute the difference between two images
- distortion_channel
- Compare one or more channels to a reconstructed image
- dup
- Return a shallow copy of the image
- dup
- Return a shallow copy of the imagelist
- each_profile
- Iterate over all the profiles associated with the image
- export_pixels
- Extract pixel data from the image into an array
- export_pixels_to_str
- Extract pixel data from the image into a string
- find_similar_region
- Search for a rectangle matching the target
- get_exif_by_entry, get_exif_by_number
- Get one or more EXIF property values for the image
- get_pixels
- Copy a region of pixels from the image
- gray?
- Are all the pixels in the image gray?
- import_pixels
- Replace pixels in the image with pixel data from an array
- monochrome?
- Are all the pixels in the image either black or white?
- opaque?
- Are all the pixels in the image opaque?
- palette?
- Is the image a PseudoClass type image with 256 colors or less?
- preview
- Show the effect of a transformation method on the image
- profile!
- Add or remove an ICM, IPTC, or generic profile from the image
- properties
- Iterate over all the properties associated with the image
- set_channel_depth
- Set the specified channel's depth
- signature
- Compute the 64-byte message signature for the image
- statistics
- Compute image statistics
- store_pixels
- Replace a region of pixels in the image
- strip!
- Strip the image of all comments and profiles
- unique_colors
- Construct an image from the unique colors
- view
- Access pixels by their coordinates.
色数を減らす
- compress_colormap!
- Remove duplicate or unused entries in the image's colormap
- grayscale_pseudo_class
- Convert the image to a grayscale PseudoClass image.
- map
- Replace the colors of the image with the nearest colors from a reference image
- map
- Replace the colors of all the images in the imagelist with the nearest colors from a reference image
- ordered_dither
- Dither the image to a predefined pattern
- posterize
- Reduce the number of colors for a "poster" effect
- quantize
- Choose a fixed number of colors to represent the image
- quantize
- Choose a fixed number of colors to represent all the images in the imagelist
サイズ変更
- change_geometry
- Compute a new constrained size for the image
- crop_resized
- Resize and crop while retaining the aspect ratio
- magnify
- Double the size of the image
- minify
- Halve the size of the image
- resample
- Resample the image to the specified horizontal and vertical resolution
- resize
- Resize the image using a filter
- resize_to_fit
- Resize the image retaining the aspect ratio
- sample
- Resize the image using pixel sampling
- scale
- Resize the image
- thumbnail
- Quickly create a thumbnail of the image
色と透明度を変更
- color_fill_to_border
- Change the color of neighboring pixels. Stop at the image's border color.
- color_floodfill
- Change the color of neighboring pixels that are the same color
- colormap
- Get or set a color in the image's colormap
- color_point
- Change the color of a single pixel in the image
- color_reset!
- Set the entire image to a single color
- cycle_colormap
- Displace the image's colormap
- erase!
- Set the entire image to a single color
- matte_fill_to_border
- Make transparent neighboring pixels. Stop at the image's border color.
- matte_floodfill
- Make transparent neighboring pixels that are the same color
- matte_point
- Make a single pixel transparent
- matte_reset!
- Make the entire image transparent
- opaque
- Change all pixels from the specified color to a new color
- pixel_color
- Get or set the color of a single pixel
- splice
- Splice a solid color into the image.
- texture_fill_to_border
- Replace neighbor pixels with pixels from a texture image. Stop at the image's border color.
- texture_floodfill
- Replace neighboring pixels that are the same color with pixels from a texture image
- transparent
- Change the opacity value of pixels having the specified color
回転・反転・せん断
- affine_transform
- Transform the image as dictated by an affine matrix
- auto_orient
- Rotate or flip the image using the EXIF orientation tag
- flip
- Create a vertical mirror image
- flop
- Create a horizontal mirror image
- rotate
- Rotate the image by the specified angle
- shear
- Shear the image along the X or Y axis, creating a parallelogram
- transpose
- Create a horizontal mirror image
- transverse
- Create a vertical mirror image
Composite
- average
- Average all the images in the imagelist into a single image
- blend
- Blend two images together
- composite
- Composite the image onto another image
- composite_affine
- Composite the image onto another image as dictated by an affine matrix
- displace
- Distort the image using a displacement map
- dissolve
- Dissolve two images into each other
- watermark
- Composite a watermark onto the image
変形
- append
- Append all the images in the imagelist into a single image
- chop
- Chop a region from the image
- coalesce
- Merge successive images in the imagelist into a new imagelist
- crop
- Extract a region from the image
- crop_resized
- Resize and crop while retaining the aspect ratio
- deconstruct
- Construct a new imagelist containing images that include only the changed pixels between each image and its successor
- flatten_images
- Merge all the images in the imagelist into a single image
- mosaic
- Inlay all the images in the imagelist into a single image
- optimize_layers
- Optimize or compare image layers
- roll
- Offset the image
- shave
- Shave regions from the edges of the image
- trim
- Remove borders from the edges of the image
Enhance
- contrast
- Enhance the intensity differences between the lighter and darker elements in the image
- contrast_stretch_channel
- Improve the contrast in the image by stretching the range of intensity values
- despeckle
- Reduce the speckle noise in the image
- enhance
- Apply a digital filter that improves the quality of a noisy image
- equalize
- Apply a histogram equalization to the image
- gamma_correct, gamma_channel
- Gamma correct the image
- level
- Adjust the levels of the image
- level_channel
- Adjust the levels of one or more channels in the image
- linear_stretch
- Stretch with saturation the image contrast
- median_filter
- Apply a digital filter that improves the quality of a noisy image
- modulate
- Change the brightness, saturation, or hue of the image
- negate, negate_channel
- Negate the colors of the image
- normalize, normalize_channel
- Enhance the contrast of the image
- reduce_noise
- Smooth the contours of an image while still preserving edge information
- adaptive_sharpen, adaptive_sharpen_channel, sharpen, sharpen_channel, unsharp_mask, unsharp_mask_channel
- Sharpen the image
- sigmoidal_contrast_channel
- Adjusts the contrast of an image channel with a non-linear sigmoidal contrast algorithm
エフェクトの追加
- adaptive_threshold
- Threshold an image whose global intensity histogram doesn't contain distinctive peaks
- add_noise, add_noise_channel
- Add random noise
- bilevel_channel
- Change the value of individual image pixels based on the intensity of each pixel channel
- black_threshold
- Force all pixels below the threshold into black
- adaptive_blur, adaptive_blur_channel, blur_image, blur_channel, gaussian_blur, gaussian_blur_channel, motion_blur, radial_blur, radial_blur_channel
- Blur the image
- colorize
- Blend the fill color with each pixel in the image
- convolve, convolve_channel
- Apply a custom convolution kernel to the image
- fx
- apply a mathematical expression to an image
- segment
- Segment an image by analyzing the histograms of the color components and identifying units that are homogeneous with the fuzzy c-means technique
- random_threshold_channel
- Change the value of individual pixels based on the intensity of each pixel compared to a random threshold.
- recolor
- translate, scale, shear, or rotate the image colors
- threshold
- Change the value of individual pixels based on the intensity of each pixel compared to threshold
- white_threshold
- Force all pixels above the threshold into white
スペシャルエフェクトの追加
- charcoal
- Add a charcoal effect
- edge
- Find edges in the image
- emboss
- Add a three-dimensional effect
- implode
- Implode or explode the center pixels in the image
- morph
- Transform each image in the imagelist to the next in sequence by creating intermediate images
- oil_paint
- Add an oil paint effect
- polaroid
- Simulate a PolaroidR instant picture
- sepiatone
- Applies an effect similar to the effect achieved in a photo darkroom by sepia toning.
- shade
- Shine a distant light on an image to create a three-dimensional effect
- shadow
- Add a shadow to an image
- sketch
- Simulate a pencil sketch
- solarize
- Apply a special effect to the image, similar to the effect achieved in a photo darkroom by selectively exposing areas of photo sensitive paper to light
- spread
- Randomly displace each pixel in a block
- stegano
- Hide a digital watermark within the image
- stereo
- Combine two images into a single image that is the composite of a left and right image of a stereo pair
- swirl
- Swirl the pixels about the center of the image
- vignette
- Soften the edges of the image to create a vignette
- wave
- Add a ripple effect to the image
- wet_floor
- Create a "wet floor" reflection of the image
Decorate
- border
- Surround the image with a solid-colored border
- frame
- Add a simulated three-dimensional border around the image
- raise
- Create a simulated three-dimensional button-like effect by lightening and darkening the edges of the image
Create thumbnail montages
- montage
- Tile image thumbnails across a canvas
Create image blobs
- from_blob
- Create an image from a BLOB
- from_blob
- Create an imagelist from one or more BLOBs
- to_blob
- Construct a BLOB from an image
- to_blob
- Construct a BLOB from all the images in the imagelist
画像のマーシャリング
ImageとImageListオブジェクトはRubyのMarshalモジュールを使ってシリアライズできる。マーシャリングはxMagickのBinary Large OBject関数ImateToBlob(ダンプ用)とBlobToImage(ロード用)を使ってサポートされる。
注
1. いくつかの画像フォーマットはダンプできないが、可能かどうかは結局試してみるしかない。
2. JPEGのような非可逆なフォーマットの画像は再現後はシグネチャが異なるためequal(<=>)を使ってオリジナルと比較してもうまくいかない。
画像上への描画とテキストの追加
DrawクラスがMagickモジュールに含まれる3つ目のメジャーなクラスだ。このクラスは大きく2種類のメソッド、drawingメソッドとannotationメソッドを定義している。
Drawing
xMagickはW3CのScalable Vector Graphics (SVG) 1.1 Specificationで定義されるコマンドと要素に非常によく似た2D描画コマンドをサポートしている。RMagickではそれぞれのコマンド(プリミティブと呼ばれる)はDrawクラスのメソッドとして実装されている。画像を描画するには単に
1. Drawクラスのインスタンスを生成して
2. 適当な引数をつけて一つ以上のプリミティブメソッドを呼び出し
3. drawメソッドを呼び出せばいい
プリミティブメソッドは直接には何も描画しない。プリミティブメソッドを呼ぶと、単にDrawオブジェクトのプリミティブリストにそのプリミティブと引数が保存されるだけだ。プリミティブリストを"実行"するには、drawを呼び出す。プリミティブを描画してもそれらは破棄されない。"canvas"として別の画像を指定してdrawをもう一度呼び出せば、別の画像にまた描画できる。もちろん一枚の画像に複数のDrawオブジェクトを描画することも可能だ。canvasはimageでもimagelistでもよく、画像ファイルを読み込んだり、ImageList#new_imageまたはImage.newで新しく作られたりする。(imagelistオブジェクトがdrawに渡されるとカレント画像に描画される。)
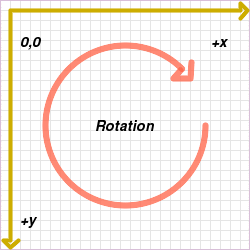
これはデフォルトの座標系の説明だ。原点は左上の角になる。そこからx軸は右に伸び、y軸は下に伸びる。単位はピクセルになる。0度は3時の方向で、回転は時計回りに行われる。回転の単位は通常「度」になる。
デフォルトの座標系はscaling、rotation、translationなどの変形を指定して変更できる。
(クリックすればこの画像を生成するためのRubyコードが見られる)
RMagickのプリミティブメソッドには、点、線、ベジエ曲線、楕円や四角などの図形、テキストを描画するメソッドが含まれる。図形と線は塗りつぶし色と線色を持つ。図形は透明度が0でない限り、塗りつぶし色で塗りつぶされる。もちろん線色の透明度が0でない限り、図形の線は線色で描かれる。テキストも図形と考えられ、線と塗りつぶしを持つ。その他のレンダリングプロパティとしては、線幅、アンチエイリアシング、ストロークパターン、塗りつぶしパターンが設定できる。
例として、画像の上に円を描くRubyプログラムを上げる。
 1. !# /usr/local/bin/ruby -w
 2. require 'RMagick'
 3.
 4. canvas = Magick::ImageList.new
 5. canvas.new_image(250, 250, Magick::HatchFill.new('white', 'gray90'))
 6.
 7. circle = Magick::Draw.new
 8. circle.stroke('tomato')
 9. circle.fill_opacity(0)
10. circle.stroke_opacity(0.75)
11. circle.stroke_width(6)
12. circle.stroke_linecap('round')
13. circle.stroke_linejoin('round')
14. circle.ellipse(canvas.rows/2,canvas.columns/2, 80, 80, 0, 315)
15. circle.polyline(180,70, 173,78, 190,78, 191,62)
16. circle.draw(canvas)
4行目と5行目で250x250の画像を一つもつ描画用のキャンバスを作成する。HatchFillオブジェクトは10ピクセルごとに薄い灰色で線が引かれた画像で埋め尽くされる。7行目でDrawオブジェクトを作り、8-15行目のメソッド呼出でプリミティブのリストを構築して、16行目のdrawメソッドでそれを"実行"する。
strokeメソッドは8行目に見られるように線の色を設定する。普通であれば図形は塗りつぶされるが(opacity=1.0)、9行目でfill_opacityを呼び出して透明度を0に設定しているので、円の背景が透けて見える。同様にふつう線の色は不透明だけど、10行目のset_opacityでこの例ではトマト色の線が少しだけ透けるようになっている。11行目から13行目のメソッド呼出で線の幅、先端の形、角の形を設定している。
14行目のellipseメソッドはキャンバスの真ん中に半径80ピクセルの円を書くように指示している。この楕円は円の315度を占め、その開始は0度(時計の3時)の方向だ。15行目で呼び出されるpolylineが円の先端に矢頭を加えている。引数は(普通偶数個で)線が通過するポイントのx座標とy座標を指定する。
最後に、16行目のdrawメソッドで保存されたプリミティブを実行してキャンバスに描画する。
Annotation
annotateメソッドは画像上に文字を描画する。一番単純なやり方では、annotateはテキストをどこに置くかと、文字列だけが指定される。
ほとんどの場合、フォントやフォントサイズ、イタリックなどのフォントファミリー、ボールドなどの文字幅、塗りつぶしや線の色、といった文字のプロパティを設定する必要があるだろう。この要求にこたえるため、Drawクラスにはattribute writersが定義されている。annotate呼び出し前にattribute writersを呼び出して好きなテキストプロパティを設定したり、またはannotate呼び出しにブロックをつけてそこで設定もできる。
以下の例でどのようにannoateを使って下の画像を表示するかを見てみる。
http://www.simplesystems.org/RMagick/doc/ex/rubyname.gif
 1.   #! /usr/local/bin/ruby -w
 2.   require 'RMagick'
 3.
 4.   # Demonstrate the annotate method
 5.
 6.   Text = 'RMagick'
 7.
 8.   granite = Magick::ImageList.new('granite:')
 9.   canvas = Magick::ImageList.new
10.   canvas.new_image(300, 100, Magick::TextureFill.new(granite))
11.
12.   text = Magick::Draw.new
13.   text.font_family = 'helvetica'
14.   text.pointsize = 52
15.   text.gravity = Magick::CenterGravity
16.
17.   text.annotate(canvas, 0,0,2,2, Text) {
18.      self.fill = 'gray83'
19.   }
20.
21.   text.annotate(canvas, 0,0,-1.5,-1.5, Text) {
22.      self.fill = 'gray40'
23.   }
24.
25.   text.annotate(canvas, 0,0,0,0, Text) {
26.      self.fill = 'darkred'
27.   }
28.
29.   canvas.write('rubyname.gif')
30.   exit
このプログラムではエッチングの効果を出すためにannotateが3回呼び出されている。3回の呼び出しは塗りつぶし色と場所以外はすべて同じパラメータを持っている。
まず8-10行目で背景を生成している。TextureFillクラスの詳細についてはFillクラスを参照。"granite"画像フォーマットはxMagick組み込み画像フォーマットの一つで、詳細については久美込みフォーマットを参照。12行目の文で文字を書き込むDrawオブジェクトを生成している。そのあとの3行はannotate呼び出し全てで共通の属性値を設定する。
一番目のannotateの引数はテキストが描画される画像になる。2-5番目の引数はそれぞれテキストが描画される領域のwidth、height、x、yになる。この領域はgravityという値が設定されていて、それでテキストの位置が決まる。gravityの値がCenterGravityのときはwidthとheightは使用されない。
17-19行目の最初のannotate呼び出しは中心から2ピクセルだけ右下にずれた位置にテキストを描画する。self.fill = 'gray83' と言う文で色は淡い灰色に設定される。21-22行目のannotateでは、濃い灰色の文字が中心から1.5ピクセルだけ左上に描画される。25-27行目にある最後の呼び出しで同じ文字列が濃赤色で画像の中心に描かれる。
次に読むべきは
次のセクション"ImageMagick/GraphicsMagick Conventions"では、xMagickが画像ファイルのフォーマットをどのように決定するかなどの、知っておいた方がいい規約について述べる。ImageMagick(www.imagemagick.org)とGraphicksMagick(www.graphicsmagick.org)のウェブサイト(このページの情報はほとんどそこから得られた)ではxMagickについてたくさんの詳細な情報がある。それらのサイトはRMagickについてのべているわけではないけど、Magick APIのメソッドについて読めばRMagickのメソッドについてもたくさんのことが学べるだろう。(このドキュメントのリファレンスセクションでは、メソッドの説明のほとんどでそのメソッドが呼び出すMagick APIの名前を書いてある。)例題のプログラムもチェックしよう。ほとんど全てのメソッドがいずれかの例題で実際に使用されている。
Good luck!